Archive for October, 2012

Map Making website Traveloggia

Oct
21

Make a Map

www.traveloggia.net

Name the map

  • Click New Map Tab ( top menu bar)

    <

  • Enter the name of your map and press save

Add a Location ( two methods)

  • Click the anchor button, the cursor is now enabled to drop a pushpin on the map wherever you click next. Zoom the map and add a push pin.

  • Type an address or place name into the search box and click the search button , a pushpin will be added automatically.

Add a Photo

  • Click the sun button ( labled add photo) Also available on the Album Page ( click Album View Tab)

  • Drag one of more photos from your hardrive into the left upload area, or click the select files button and choose an image file from the the file list

  • Click upload, you will be prompted to visit the album page when the upload completes

Add Info

  • On the Map View page, in the upper right corner, click the (tiny) pencil icon. This puts the info panel into edit mode enter any descriptive text you need and click save.

  • On the Album View page click the pencil icon under the image to enter edit mode to add a caption, then press save.

Repeat steps above to add more locations and photos to your map.

Get the App

Import your maps to Traveloggia wp7 app

Traveloggia Squirt

Illustrated User Guide for Traveloggia Squirt

Traveloggia SQUIRT wp7 app Illustrated Guide

Oct
17

This is it! Set sail on the adventure of your dreams…

Get the App

www.windowsphone.com/en-us/store/search?q=squirt

Login Page


facebook oauth login screen
Either use an existing facebook account


Traveloggia Login, email and password
or create a Traveloggia account, by entering an email address and password

Map Page


Map Page with map name in gold at the top
Arrive at the Map Page after logging in. A default map is created, named according to the date.

Add a Location (two methods)


Moon and Stars icon Current Location Button

Current Location:

tap Stars and Moon button


search button

Searched Address:

  • tap search button
  • enter address
  • tap ship button – IT SAILS!

Save Location


Anchor Button equals Save Location

tap anchor button ( saves most recently added location )

Details Page


Edit Details Page
Enter contact info,comments. Tap save edits

Add Photo


tap sun button on app bar, to launch camera, available from all pages

Album Page


Image will appear on just taken panel of Album Page.
Tap the ellipsis menu.

Share Photo and Location

Share to Traveloggia map:

Select a map to upload the
currently selected location and photo to. (revisit the website
and check it out, copy the link at the bottom of the website
and share the map)

Share to Facebook:

the photo will be posted with a link to
the traveloggia website displaying the location and photo.

Map List Page

Navigate to Map List Page


to access the Map Page, tap islands app bar button, or back button


from the Map Page tap the ships steering wheel button to access the Map List page.

Select a Map

select a map to download, by tapping the down arrow button.


redirect to map page, downloaded map loads

Make a Map

Visit the traveloggia website to create a map

TRAVELOGGIA

Illustrated User Guide for Traveloggia Web

Traveloggia Squirt on Marketplace

Oct
16

This is it!  Set sail on the adventure of your dreams…

Get the App

www.windowsphone.com/en-us/store/search?q=squirt (windows phone required )

  1. Login, either use an existing facebook account or create a Traveloggia account, by entering an email address and password.
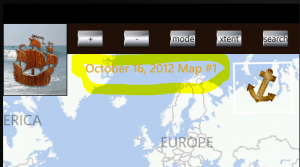
  2. Arrive at the Map Page after logging in. A default map is created for you and named according to the date.
  3. Add Location( two methods)
    1. Current Location –tap Stars and Moon button
    2. Searched Address
      i. tap search button
      ii. enter address or place name
      iii. tap ship button – IT SAILS!
  4. Save Location –
    1. tap anchor button ( saves most recently added location )
    2. Enter location details
  5. Add a Photo. Tap the sun button ( far right app bar buttons) Camera is launched, photo will appear on Album Page
  6. Share Photo and Location. Tap the ellipsis menu
    1. Share to Traveloggia map. Select a map to upload the currently selected location and photo to. (revisit the website and check it out, copy the link at the bottom of the website and share the map)
    2. Share to Facebook, the photo will be posted with a link to the traveloggia website displaying the location and photo.
  7. Download a Map. From the Map page, (tap islands app bar button ) Tap the ships steering wheel button to access the Map List page. From the list of maps which are the same maps as on the website, select one to download, by tapping the down arrow button.

Make a Map

www.traveloggia.net

  1. Name the map
    1. Click New Map Tab ( top menu bar)
    2. Enter the name of your map and press save
  2. Add a Location ( two methods)
    1. Click the anchor button, the cursor is now enabled to drop a pushpin on the map wherever you click next. Zoom the map and add a push pin
    2. Type and address or place name into the search box and click the search button , a pushpin will be added automatically.
  3. Add a Photo
    1. Click the sun button ( labled add photo) Also available on the Album Page ( click Album View Tab)
    2. Drag one of more photos from your hardrive  into the left upload area, or click the select files button and choose an image file from the the file list
    3. Click upload, you will be prompted to visit the album page when the upload completes
  4. Add Info
    1. On the Map View page, in the upper right corner, click the (tiny) pencil icon.  This puts the info panel into edit mode enter any descriptive text you need and click save.
    2. On the Album View page click the pencil icon under the image to enter edit mode to add a caption, then press save.

5.         Repeat steps above to add more locations and photos to your map.

Traveloggia Squirt coming soon

Oct
3


Try Traveloggia Keeper on Microsoft Marketplace

Try SD Solar Homes ( Traveloggia Radio Edition) on Microsoft Marketplace